3D45 Printer Set-Up
This page walks you through the 5 basic steps to get your Dremel 3D45 setup and ready to print. Watch the video (3min) for an overview.
1. Unboxing and Hardware Walkthrough
4. Leveling Printer Build Platform and
5. Sending print file to print
+ Download PDF version of Quick Start Guide
(English / Spanish / French / German)
1. Unboxing and Hardware Walkthrough
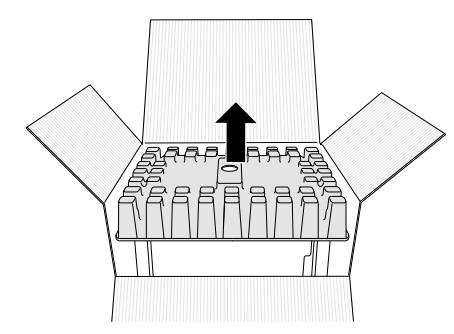
1. Place box on table, cut tape, and open.
2. Remove top insert
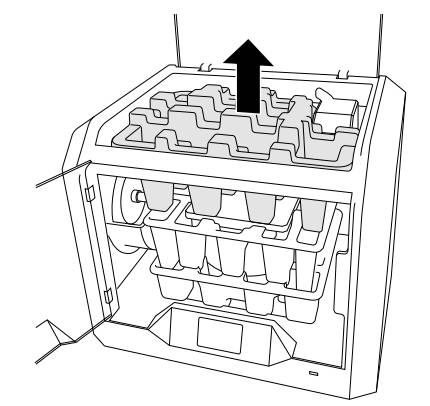
3. Remove 3D45 and place on table.
4. Open lid and remove top insert.
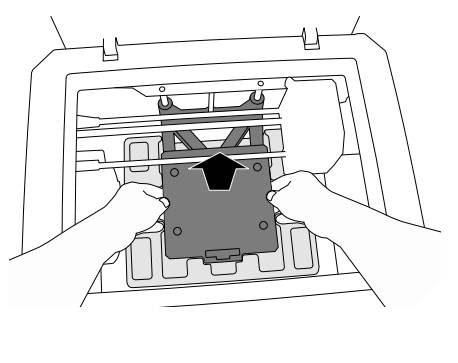
5. Raise build platform by lifting from both sides.

6. Open door and remove middle insert.
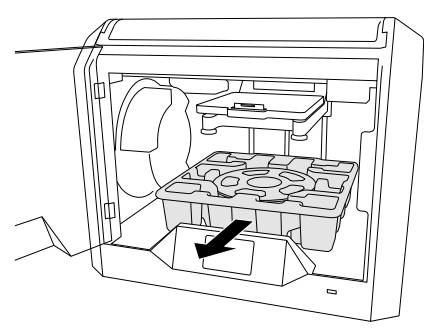
7. Remove bottom insert.
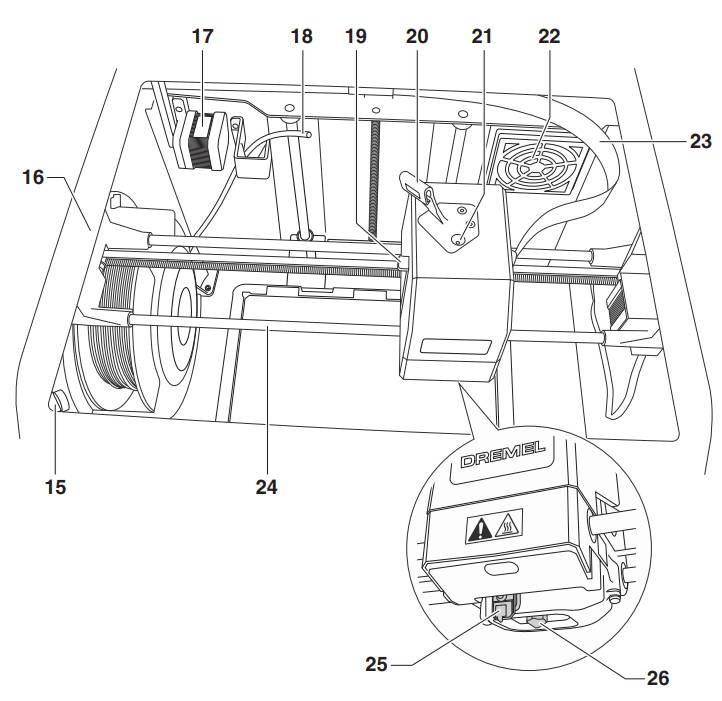
Kit Content
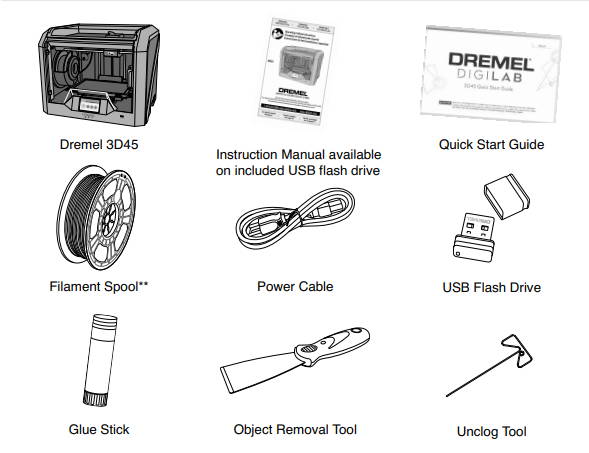
**Quantities may vary depending on kit
Hardware
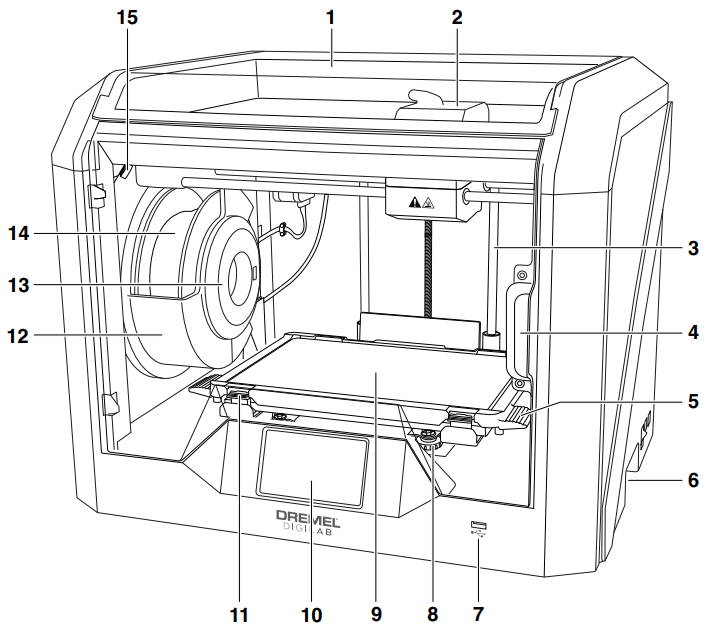
1. Lid
2. Extruder
3. Z-Axis Guide rail
4. Door
5. Build Platform Tabs
6. Gripping Handles
7. USB A Port
8. Leveling Knobs
9. Build Platform
10. Touch Screen
11. Build Platform Clips
12. Filament Spool Holder
13. RFID Reader
14. Filament Spool
15. Camera
15. Camera
16. Y-Axis Guide Rail
17. Stepper motor
18. Filament Guide Tube
19. Extruder Lever
20. Filament Guide Clip
21. Extruder Intake
22. Chamber Fan
(With optional filtration
hook-up)
23. Ribbon Cable
24. X-Axis Guide Rail
25. Leveling Sensor
26. Extruder Tip
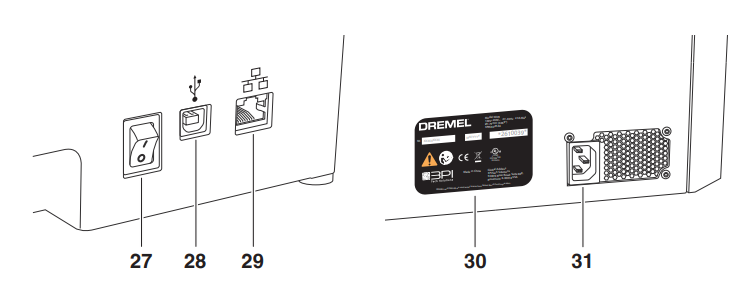
27. Power Switch
28. USB B Port (Disabled)
29. Ethernet/LAN Port
30. Nameplate
31. Power Input
Turn on your printer
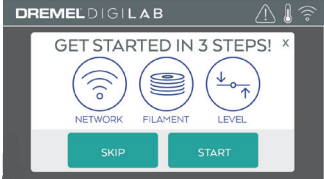
1. Follow the instructions to select your country, language, and read/accept
the End User License Agreement (EULA).
2. Tap “Start” to begin.
Note: If you tap “Skip” or exit out of the quick start configuration, please go to
3D45 manual to configure your printer from the Home page.
2. Setting up Network / Wi-Fi
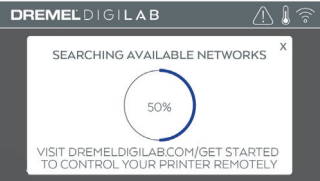
1. If you choose “Start” when you turn on your printer, 3D45 will automatically connect to your ethernet (if plugged into router) or search for available wireless networks.
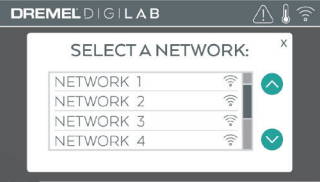
2. Choose your wireless network using the touch screen. Use the arrows to scroll through the list of available wireless networks. Tap on your network name to accept it.
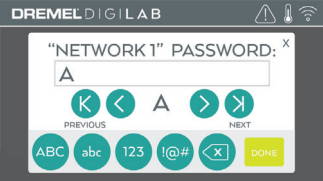
3. Enter your wireless network password and tap “Done”.
3. Loading Filament
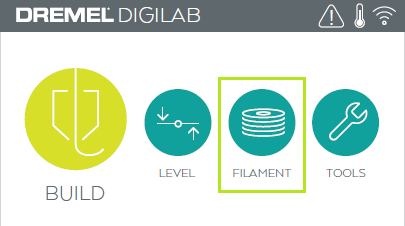
1. Tap “Filament” on your Dremel 3D45’s touch screen and wait for extruder to heat
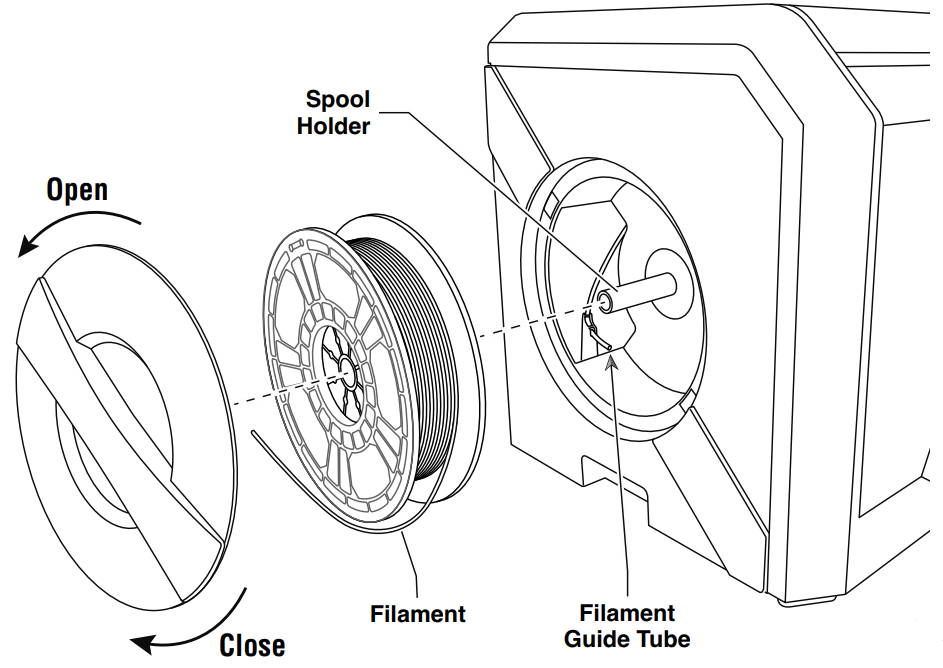
2. Twist spool door counter-clockwise and remove.
3. Place filament spool onto spool holder with spool being fed from the bottom towards the back of the Dremel 3D45.
4. Thread tip of new filament through guide tube, place spool on spool holder, replace spool door by aligning locking tabs and rotating clockwise
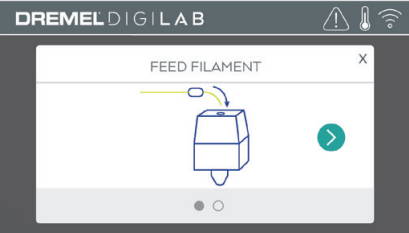
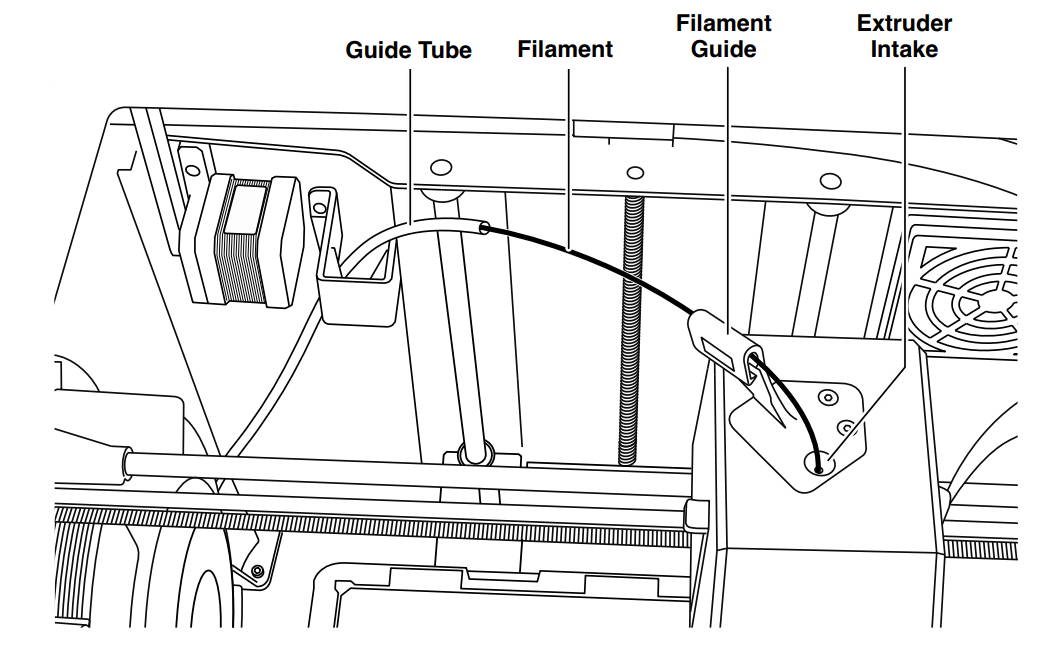
5. When Feed Filament screen appears, tap “Next” and thread filament into extruder intake until extruder feeds through on its own.
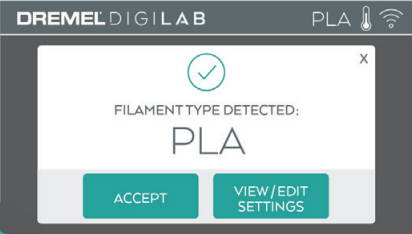
7. When you place a roll of Dremel filament into the spool holder, the printer will auto-recognize the filament type and optimize the printer settings accordingly.
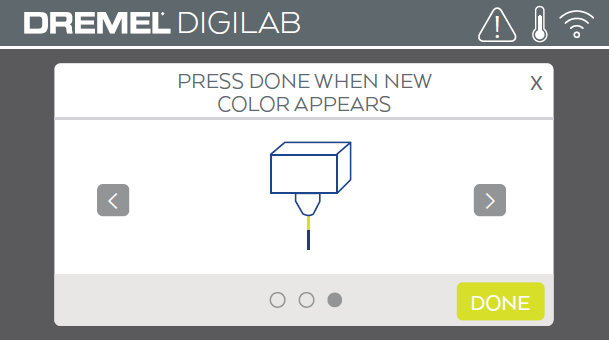
8. Filament will be drawn into the extruder and begin to exit from the hot extruder tip.
NOTE: Your Dremel 3D45 was tested by building objects before leaving the factory. These test objects may have been made with a different filament color than you are using. Therefore, a small amount of filament may be remaining in the extruder.
9. When new filament appears from extruder tip, tap “done” on touch screen to complete filament load process, return to main menu, and calibrate
extruder. Carefully remove excess filament without touching hot extruder tip. If necessary, carefully remove debris from extruder tip with needle nose pliers.
4. Leveling printer Build Platform
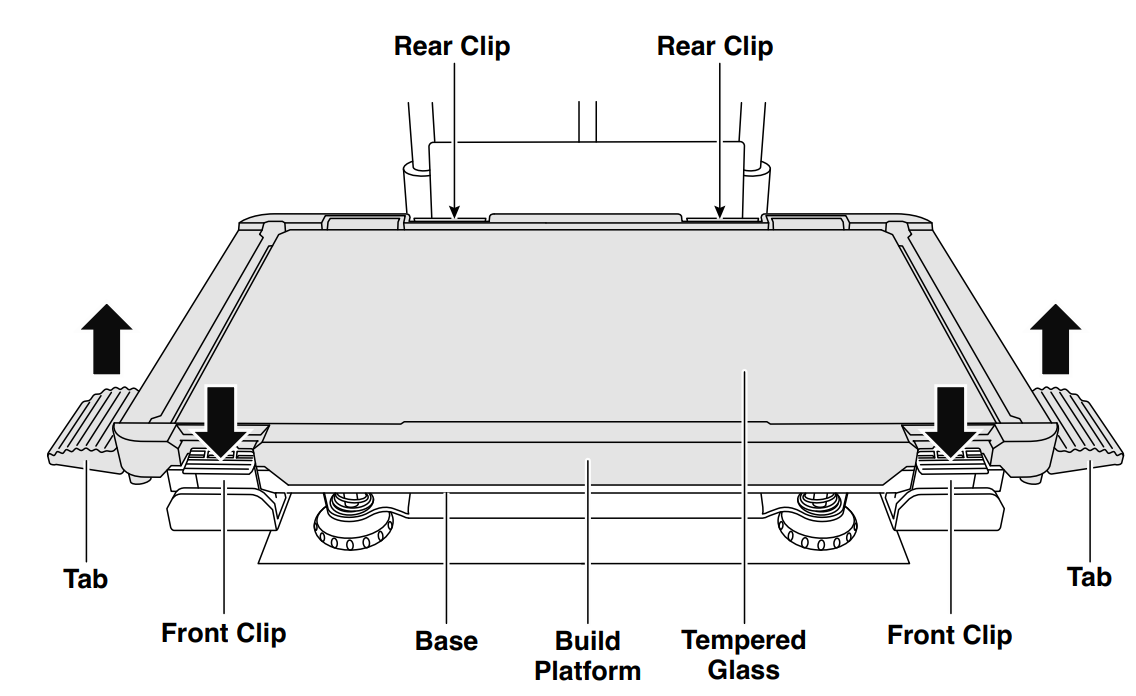
1. Remove build platform by first pressing down and releasing the two clips located at the front, then liftt he build platform off the base using the tabs.
2. Apply a thin layer of glue with the provided glue stick to the build platform and secure in place. For more information on how to apply glue click here
3. Install the build platform by first inserting the rear of the platform onto the rear clips, then press down on the front of the platform until it snaps in place.
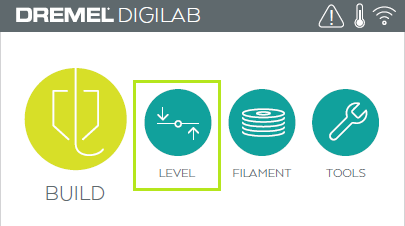
1. Tap “Level” on your Dremel 3D45’s touch screen.
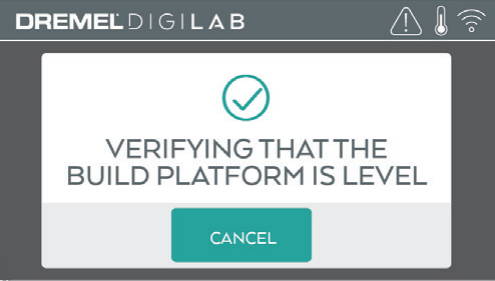
2. 3D45 will first check the level at the back of the build platform, then move to the first leveling position.
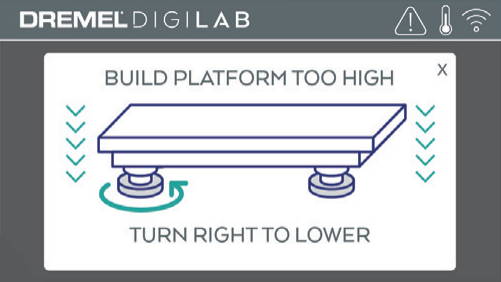
3. The touchscreen will indicate if your build platform is too high or too low.
If the build platform is too high, turn knob to the right, if it's too low, turn knob to the left until you hear a “beep”. Tap “Verify” to check the bed level again.
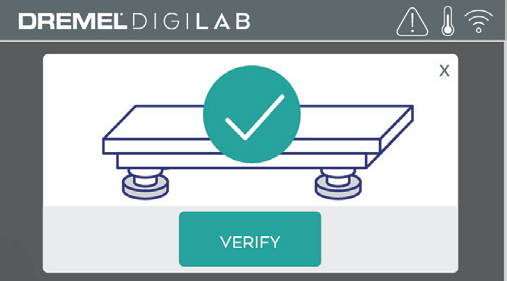
4. Repeat previous step for the second leveling position.
5. When the build platform is level, extruder will automatically move to the calibration position and complete the leveling process.
5. Sending print file to print
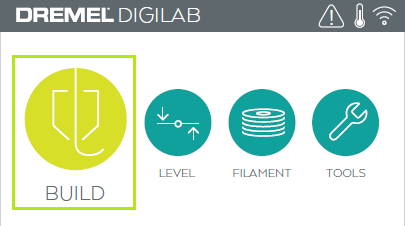
1. On the main screen, tap the “Build” option. Then tap the machine icon to select from pre-installed models.
2.On the build menu tap the printer icon.
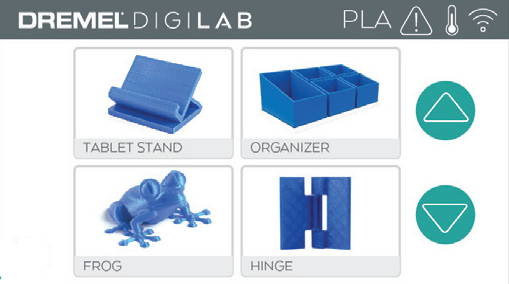
3. Tap the model file you would like to build.(Use arrows to scroll through pages)
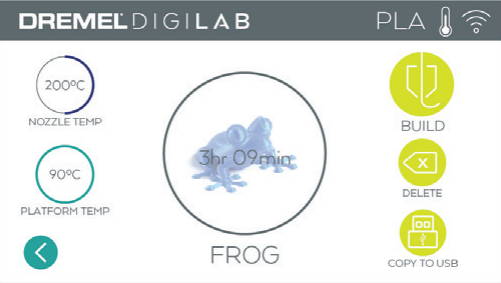
4. In the model detail page tap “Build” to begin building process.
Once the correct temperature is reached, your model will begin to build.
Once your object is finished wait until the touch screen indicates that the extruder and build platform is “cool” to remove your object.